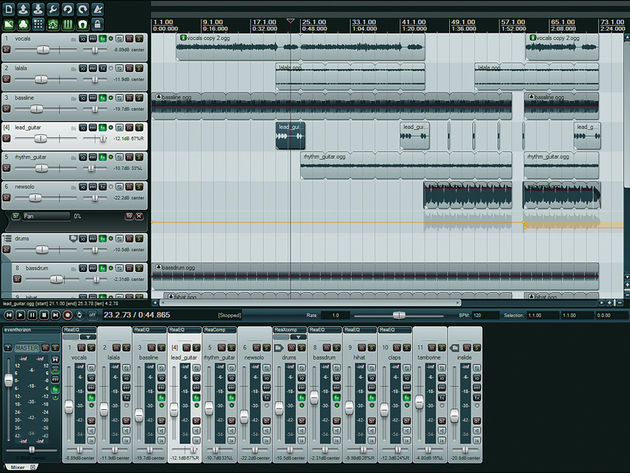
Not tried Reaper yet? You should.
12 Reaper tips and tricks you need to know
MusicRadar users dig Reaper - in fact, you recently voted it your favourite DAW.
This cross-platform application has a tiny installer (just 8MB, in
fact), yet boasts powerful features that put it on a par with many of
its more expensive rivals. What's more, those who've been frustrated by
other DAWs frequently report that it's easier to use.
If you're just getting acquainted with the software - or you're considering trying it for the first time - here are 12 things to bear in mind…
1. Pitch up
If
you're stuck with a dodgy vocal take, don't panic - you might be able
to get away without re-recording it. Reaper includes a handy little
plug-in called ReaTune, which works in a similar way to Antares
Auto-Tune. Simply set the correction mode to a scale and key, and the
plug-in will do the rest. Alternatively, the manual correction mode can
be used for more in-depth pitch manipulation.
2. System overload
When
using lots of plug-in instruments and effects, you may find yourself
running out of CPU power. Thankfully, Reaper's Performance Meter window
offers the most advanced performance analysis we've seen, showing you
exactly which tracks are consuming the most power. It can be accessed
from the View window.

3. Chained up
One
cool way to streamline your workflow is to save commonly-used
combinations of instruments or effects as FX chains. To do this,
right-click the FX window and select Save FX Chain. These can then be
added to any track by right-clicking it and selecting Add FX Chain.
4. In a jam
Stuck
for inspiration? Reaper includes a great tool for online collaboration
in the shape of ReaNINJAM. This plug-in enables users to jam together
over the internet. For more details, head to the NINJAM website, where you can access the NINJAM community forum.

5. Window of opportunity
These
days, many DAWs eschew multiple floating windows and instead opt for a
single-window approach. Reaper gives you the best of both worlds: by
default, the MIDI grid editor, performance meter and so forth all open
in new windows. However, they can also be docked at the bottom of the
screen by right-clicking them and selecting the Dock option.
6. Double take
Need
to beef up a track in a hurry? Give Reaper's Tracks»Duplicate Selected
Tracks function a whirl. This creates identical copies of any and all
selected tracks, making it perfect for doubling MIDI lines, or for
performing parallel processing on audio parts.
7. Curve Ball
Reaper
offers a variety of different automation curves. To select a curve
type, right-click an automation point and pick Select Shape For All
Selected Points from the menu. You'll be presented with a choice of
several well thought-out curve types, which can help make getting that
perfect sweep or fade that little bit easier.
8. Locking up
With
complex projects, it's easy to get confused and edit items you might
not mean to. In order to avoid this, check out Reaper's lock function.
Open the Appearance»Media section of the Preferences menu and ensure
that both Locked and Unlocked in the Media Item Icons panel are
selected. All media items will now display a lock icon that enables you
to fix their position.
9. Causing ripples
Another
useful feature when working with complex or longer projects is Reaper's
ripple mode. This is activated by pressing Alt+P, or via the
Options»Ripple Editing menu entry. With ripple edit mode activated, any
audio object you move on any given track will also move everything else
on that line.
10. Taking a sample
One of
Reaper's best-kept secrets is the ludicrously-named ReaSamplOmatic 5000
instrument. A basic sampler, it's nothing particularly out of the
ordinary, but its modest CPU usage requirements and straightforward
interface make it worth checking out. It can only load a single sample,
but you can use multiple instances for multisampled patches and drum
kits.

11. Power trip
If
you're struggling to keep those CPU cycles down, consider using
Reaper's clever Render Selected Tracks To Stem Tracks (And Mute
Originals) function, in the Track menu. This quickly creates a bounced
version of each track, including any effects processing. With the
original tracks automatically muted, your CPU is freed up for other
tasks.
12. Cash register
If you continue
to use Reaper after the 30-day evaluation period, you really should
register it. Not only will this help fund development of the DAW and
give you a nice, warm feeling inside, but once you've done it, you won't
have to wait for the irritating countdown timer each time you launch
it.
For a complete guide to using Reaper, check out the May issue of Computer Music (CM151) which is on sale now.Source: http://www.musicradar.com/tuition/tech/12-reaper-tips-and-tricks-you-need-to-know-250130